🛠️ Adjustable Woodworking Template Gauge – Red Sliding Contour Layout Tool with Pivoting Angle Blades & Locking Knobs for Stair Treads, Window Sills & Custom Shelves 🔴📐
🛠️ Adjustable Woodworking Template Gauge – Red Sliding Contour Layout Tool with Pivoting Angle Blades & Locking Knobs for Stair Treads, Window Sills & Custom Shelves 🔴📐

BUNDLE & SAVE
Couldn't load pickup availability

🛠️ Adjustable Woodworking Template Gauge – Red Sliding Contour Layout Tool with Pivoting Angle Blades & Locking Knobs for Stair Treads, Window Sills & Custom Shelves 🔴📐
Stop Guessing. Capture the Shape. Make the Cut.
Ever tried fitting a wooden board into an opening that isn't perfectly square? Measuring one side at a time can leave you guessing about the angles. This adjustable woodworking template gauge captures the opening's span and end angles, then lets you transfer the layout directly onto your board. Fit the space first. Mark your material with more confidence.

Capture the actual opening before transferring the layout to your workpiece.
Not Every Opening Has a Perfectly Straight Edge.
Window recesses, fitted boards and custom woodworking projects often have different angles on each side. The two pivoting end blades can be positioned independently to follow those boundaries. Instead of estimating the angle, capture the shape from the actual opening. Let the space guide your layout.

Position each end to match the corresponding side of the opening.
Follow angled boundaries instead of relying on a simple straight measurement.
Use the actual opening as the reference for your next cut layout.
Slide. Position. Match the Space.
Different projects call for different layouts. The overlapping slotted bars slide along one another, allowing you to adjust the template span to suit the opening. Position the end blades where they meet the sides, then check that the whole layout follows the space correctly. One adjustable tool for a variety of fitting projects.

Adjust the overlapping sections to follow the opening's span.
Set the tool according to the shape of the individual project.
Position the sections by hand before securing the selected layout.
Set It. Lock It. Move with Confidence.
Getting the shape right is only part of the job. You also want the settings to stay in place when moving the template. The hand-tightened locking knobs secure the sliding sections after positioning. Tighten them, check the alignment and lift the gauge away carefully. Hold the captured layout before transferring it.

Secure the adjusted sections without a complicated setup.
Help keep the selected span and end angles in place during transfer.
Verify that all sections are locked and the template holds its shape.
Take the Shape Straight to Your Board.
Here's where the template really earns its place in the workshop. Once the shape is captured and secured, place the gauge flat against your workpiece. Trace along the end-blade edges to transfer the layout onto the material. Check the orientation and intended cutting allowance before making your cut. Less guesswork. A clearer starting point.

Place the locked template onto the workpiece.
Use the blade edges to mark the intended layout.
Double-check the markings and board orientation before using cutting tools.
Give Every Stair Tread Its Own Template.
Stair projects can be tricky when the sides of an opening don't line up perfectly. Position the template between the stair sides, adjust the sliding bars and pivot both end blades to follow the opening. Capture each tread individually rather than assuming every step has the same shape. A more deliberate approach to custom stair fitting.

Position the end blades against the actual boundaries.
Check individual openings because stair shapes may vary.
Use the captured layout to mark the next wooden tread.
Make Awkward Alcoves Easier to Fit.
Building a shelf into a recessed wall can be frustrating when the sides aren't perfectly square. The adjustable template helps capture the shape of the opening so you can bring that layout back to your workbench. Plan the fit before cutting your shelf board.

Capture the actual shape of the space where the shelf will sit.
Transfer the opening's outline onto your chosen workpiece.
Use the same layout method for other suitable fitted woodworking tasks.
Simple Parts. A Smart Layout Solution.
The design brings together overlapping slotted bars, two pivoting end blades and hand-tightened knobs. Each component has a clear purpose in the measuring and layout process. The red connecting sections and black end blades also make the tool easy to recognize on a busy workbench. Practical design without a complicated workflow.

Allow the connecting sections to slide and adjust.
Pivot to follow the boundaries of the opening.
Hold the chosen position before the template is transferred.
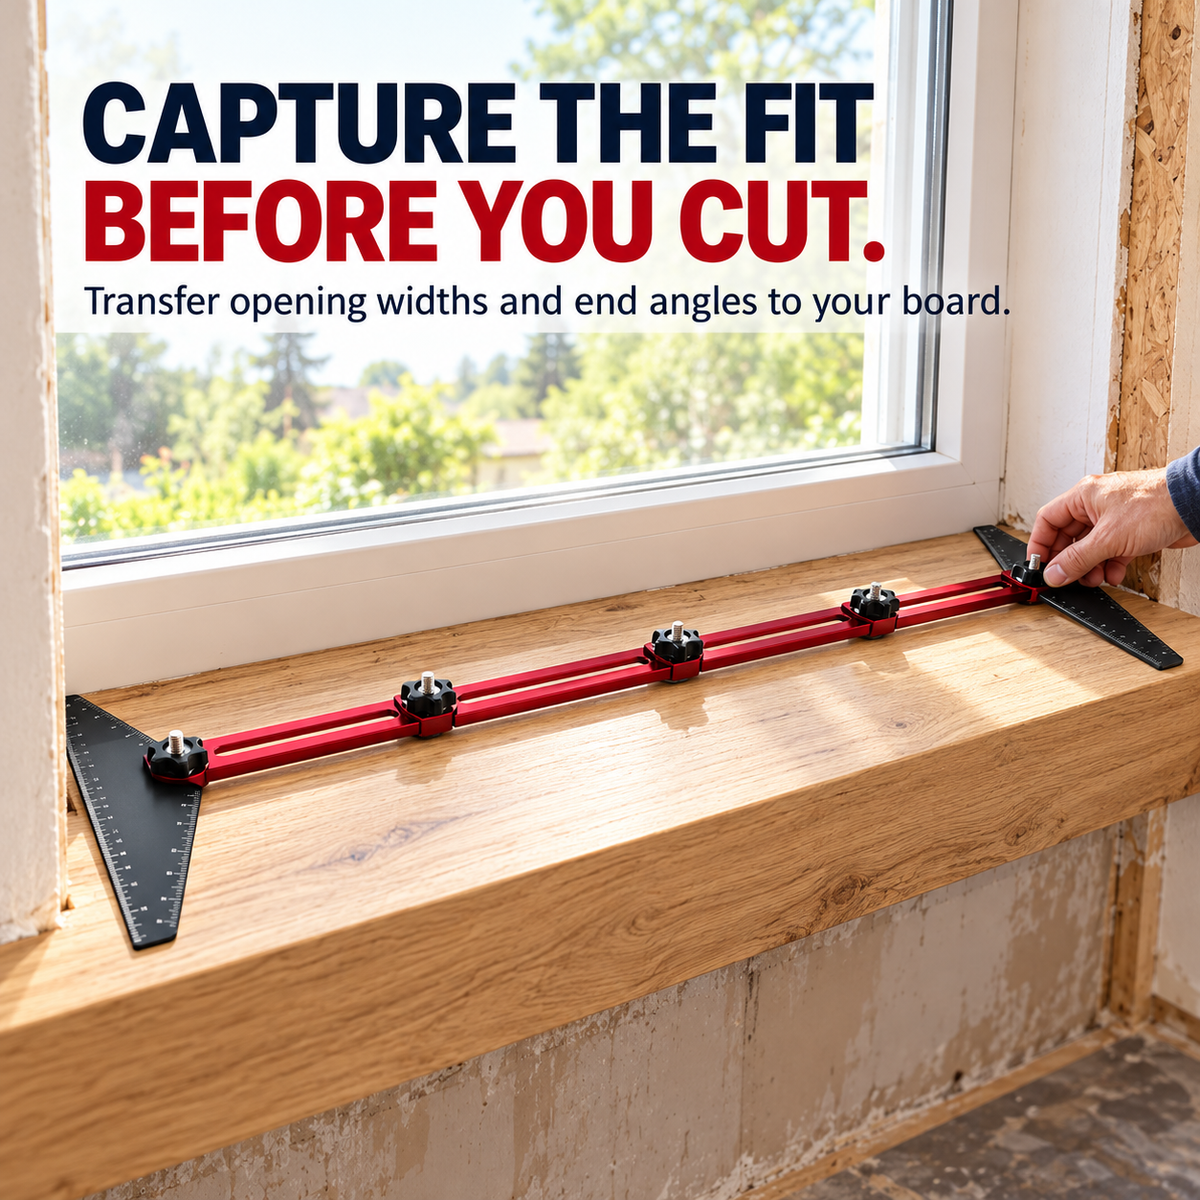
Get the Window Recess Shape Before You Cut.
Window openings can have uneven side angles and recessed edges that are difficult to reproduce with ordinary straight measurements. Place the template inside the opening, position the end blades and transfer the captured layout to your window-board material. Bring the opening's shape back to your workbench.

Position the template against the actual window opening.
Set the end blades to match the sides of the recess.
Transfer the captured outline to the board before cutting.
Make Your Next Cut a Planned One.
Whether you're working on a custom shelf, window board or staircase, good woodworking starts with a reliable layout. Capture the opening, secure the template and transfer the shape to your material. It is a practical addition to a workshop routine where accurate fitting matters. Measure the space. Transfer the layout. Work with a clearer plan.

Everything About the Design.
Fit. Lock. Transfer.
Place the template against the opening. Slide the connecting sections and position both end blades to follow the boundaries.
Tighten the hand-adjusted knobs. Check that the end angles and sliding sections hold their positions.
Move the template to your workpiece, trace along the blade edges and verify the markings before cutting.
Frequently Asked Questions.
What does this woodworking template gauge do?
It captures the span and end angles between two sides of an opening, then provides a template that you can move to a board for marking.
Can both end blades be adjusted independently?
Yes. Each end blade pivots at its mounting point. Position both blades to match the opening, then tighten the locking knobs.
Can the center sections slide?
Yes. The overlapping slotted bars slide to adjust the template span for the opening you are working on.
How do the locking knobs work?
The knobs are tightened by hand to help hold the selected position of the sliding bars and end blades before transferring the layout.
Can I use it for stair treads?
Yes. It can help capture the space between stair sides for individual tread layouts. Check each opening separately because stairs may not all have identical shapes.
Is it suitable for window sills and boards?
Yes. Place the template in the window recess, adjust the end blades to follow the side angles and transfer the layout to the window-board material.
Can I use it for fitted shelves?
Yes. It can assist with capturing the shape of alcove openings and other suitable fitted shelf spaces.
Does this tool cut wood?
No. It is a measuring and layout template. You will need separate cutting tools appropriate for your material.
Can it fit every opening?
Not necessarily. Its sliding adjustment has a working range. Check that the selected model suits your intended opening before purchasing.
Do I need additional tools?
A pencil is useful for transferring the layout. Separate cutting equipment is required to complete the woodworking project.
Are pencils and wooden boards included?
No. These are demonstration and styling items shown in the product images. Refer to the selected variant for the actual package contents.
Should I check the layout before cutting?
Always. Confirm that the template has held its settings, verify the board orientation and account for the intended fit and cutting allowance before making the cut.
The Right Fit Starts with the Right Layout.
From custom stair treads to window boards and fitted shelves, stop relying on guesswork when the opening has an awkward shape. Capture the space, secure the template and transfer your layout to the board. A smarter starting point for your next woodworking project.
Back To The Top ↑